
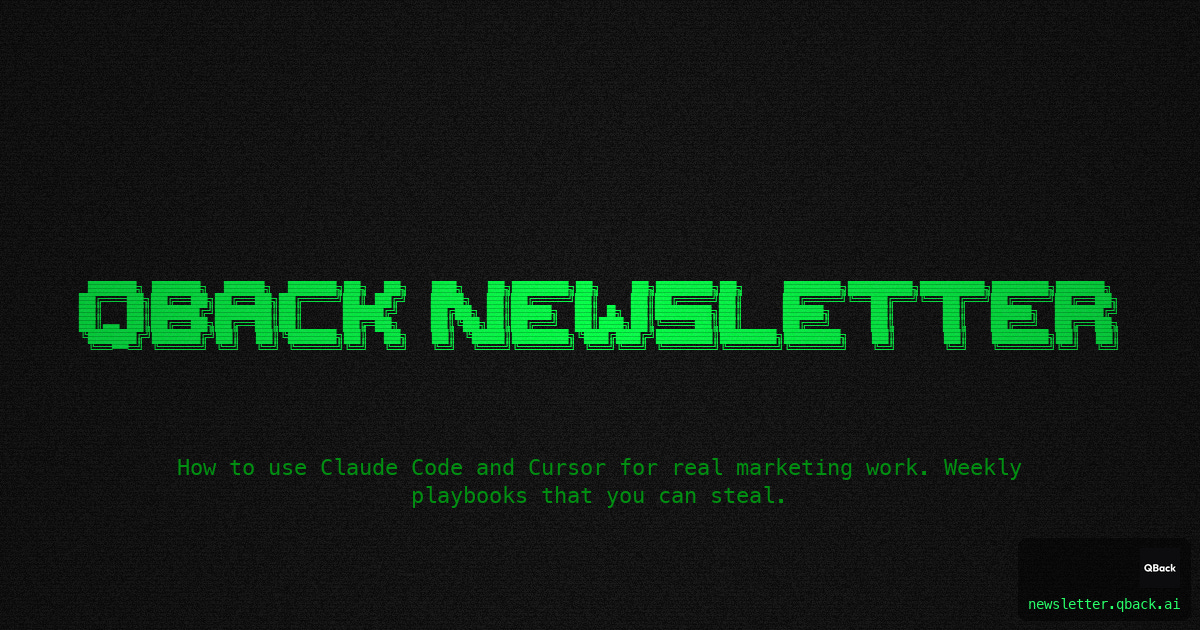
How to build images and videos inside Cursor and Claude Code using Remotion
I talk to my editor, it makes images and videos. that’s it.

I was tired of opening Figma every time I needed a newsletter header. Flow-state writing, need an image, context-switch to Figma, 20 minutes later I'm back and I forgot where I was going with the thing I was writing.
And for videos it’s even worse because that’s a whole day gone, or you’re hiring someone to do it for you.
So I built something stupid simple: an image generator AND a video generator that both run inside Cursor (or Claude Code, whatever you’re using, same idea).
Taste was good but execution still needs some work. I went for that whole retro aesthetic that’s everywhere in developer tools right now, some people call it 90s vibe, some call it dithered, whatever it is it looks cool and makes your brand feel more relatable to devs.
I’m going to show you exactly how I built both, and it took about an hour total.
Why this aesthetic matters right now
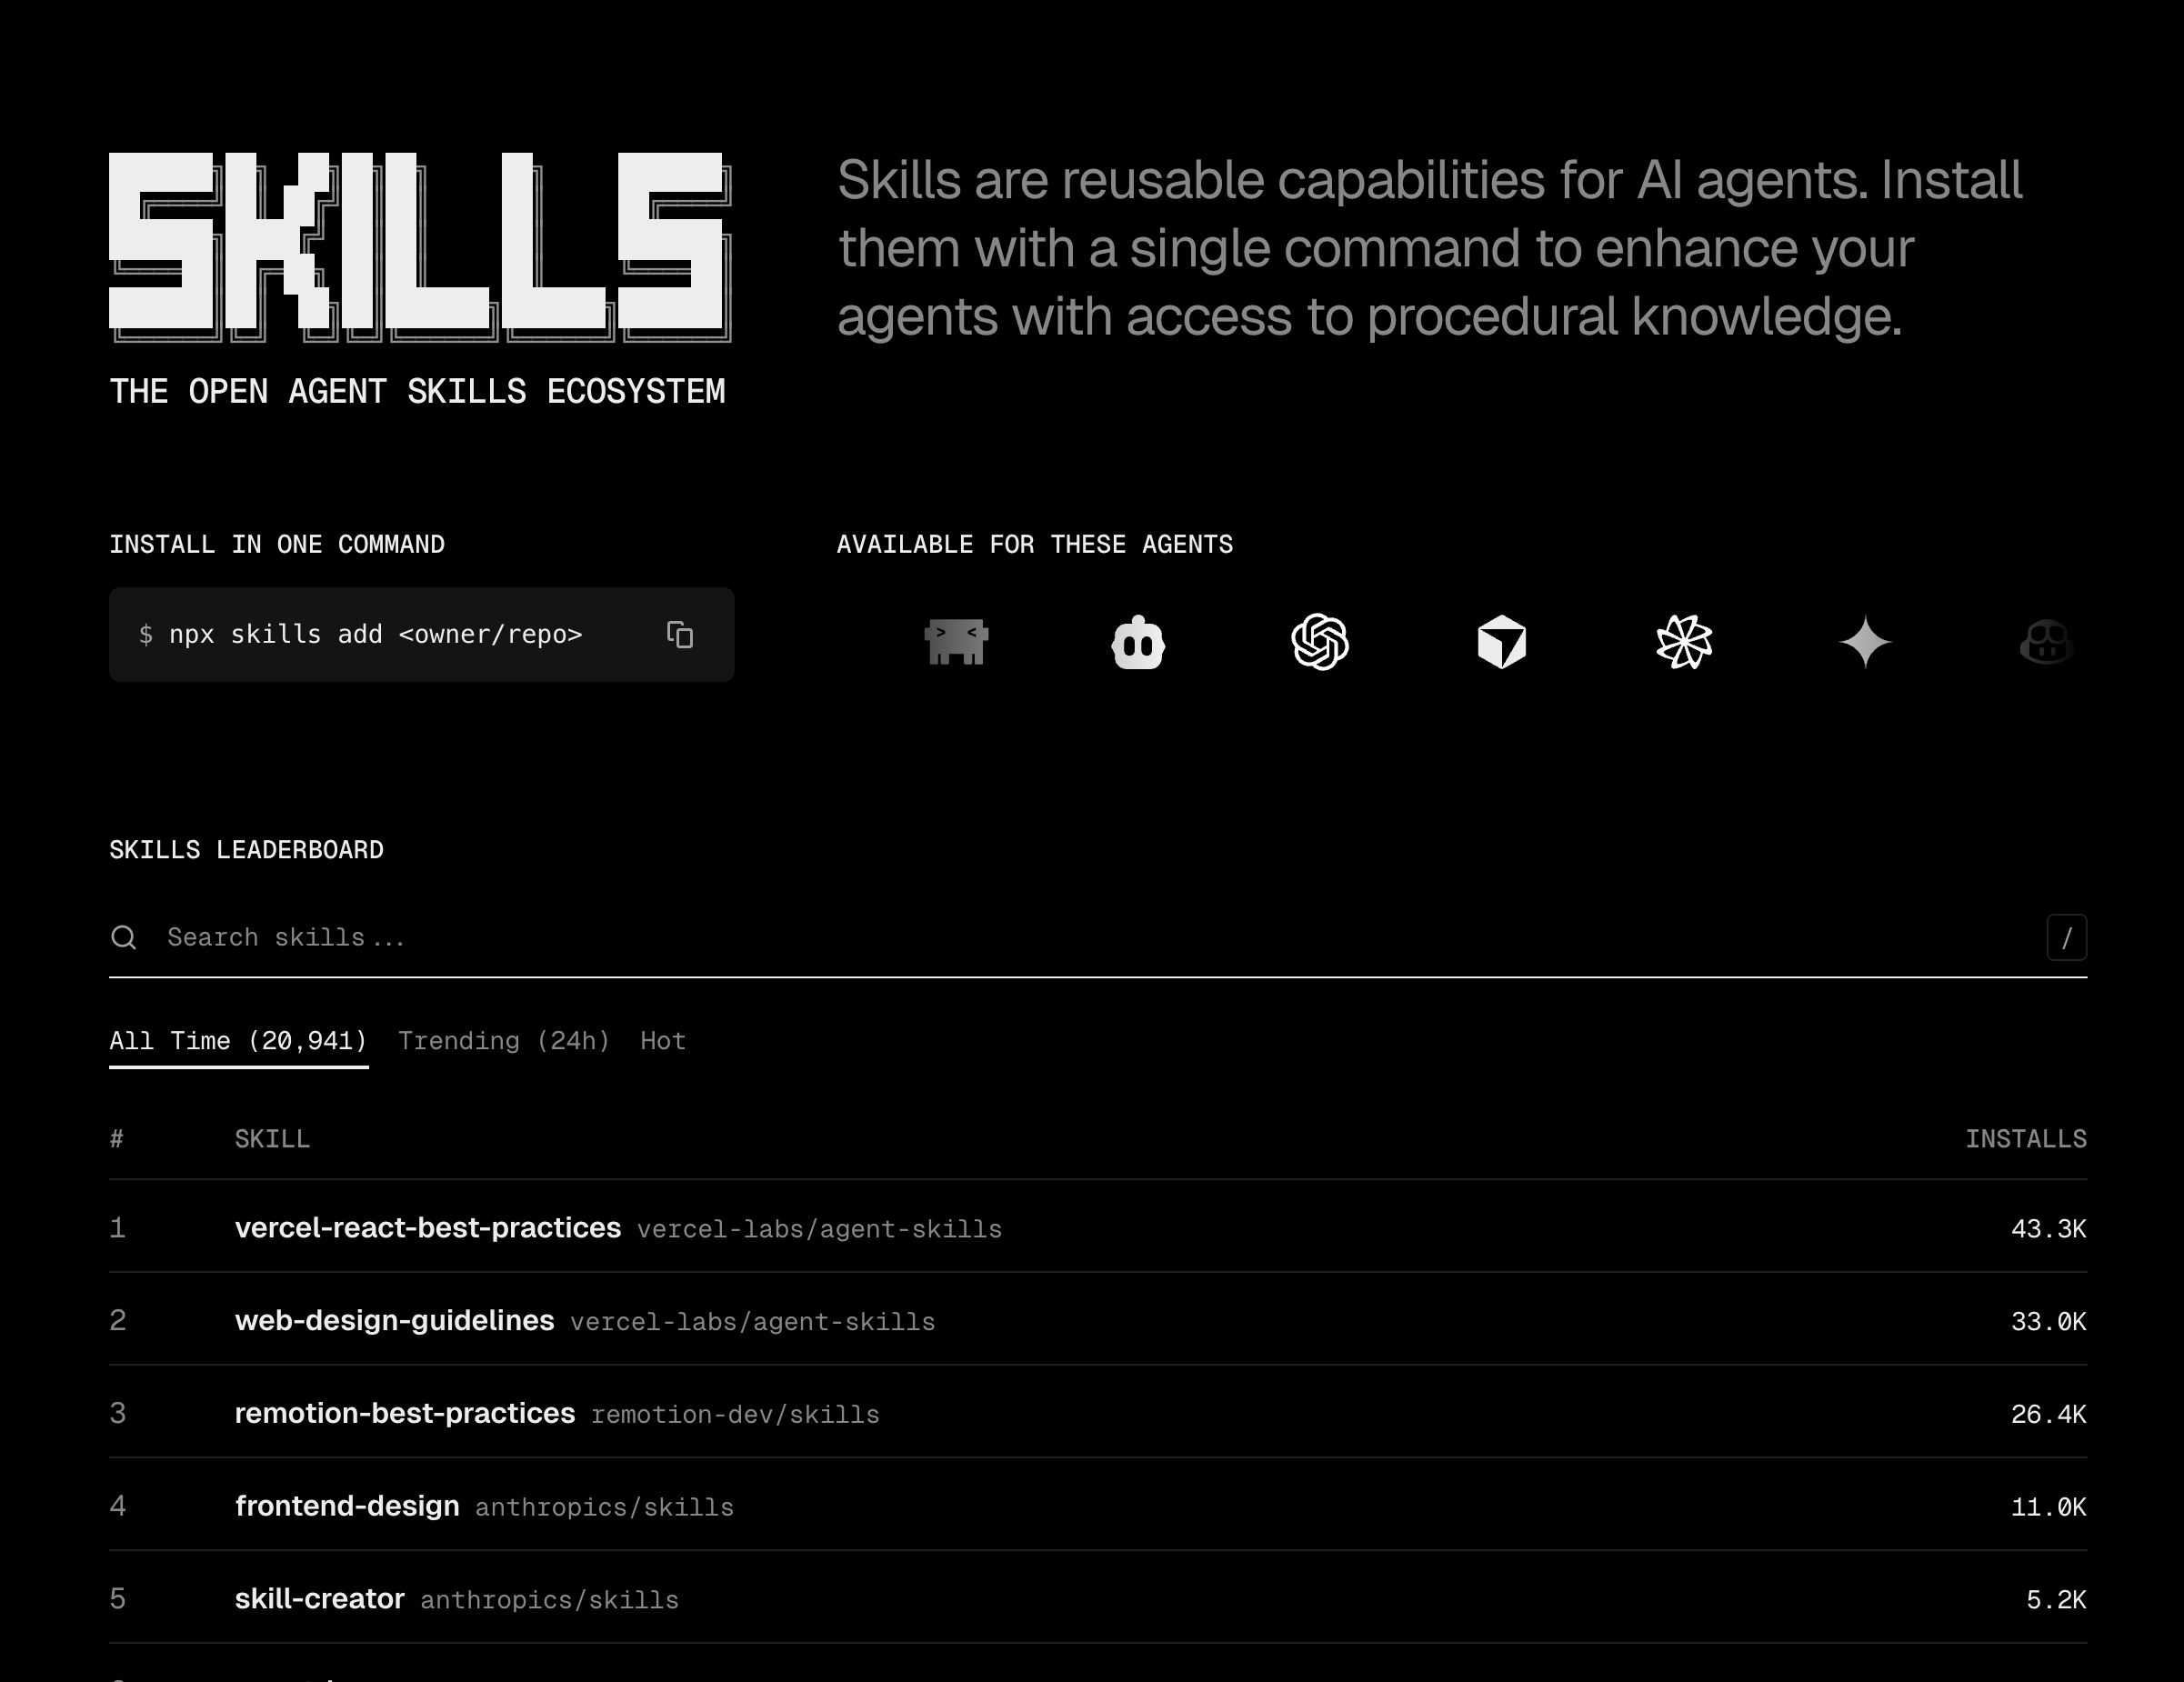
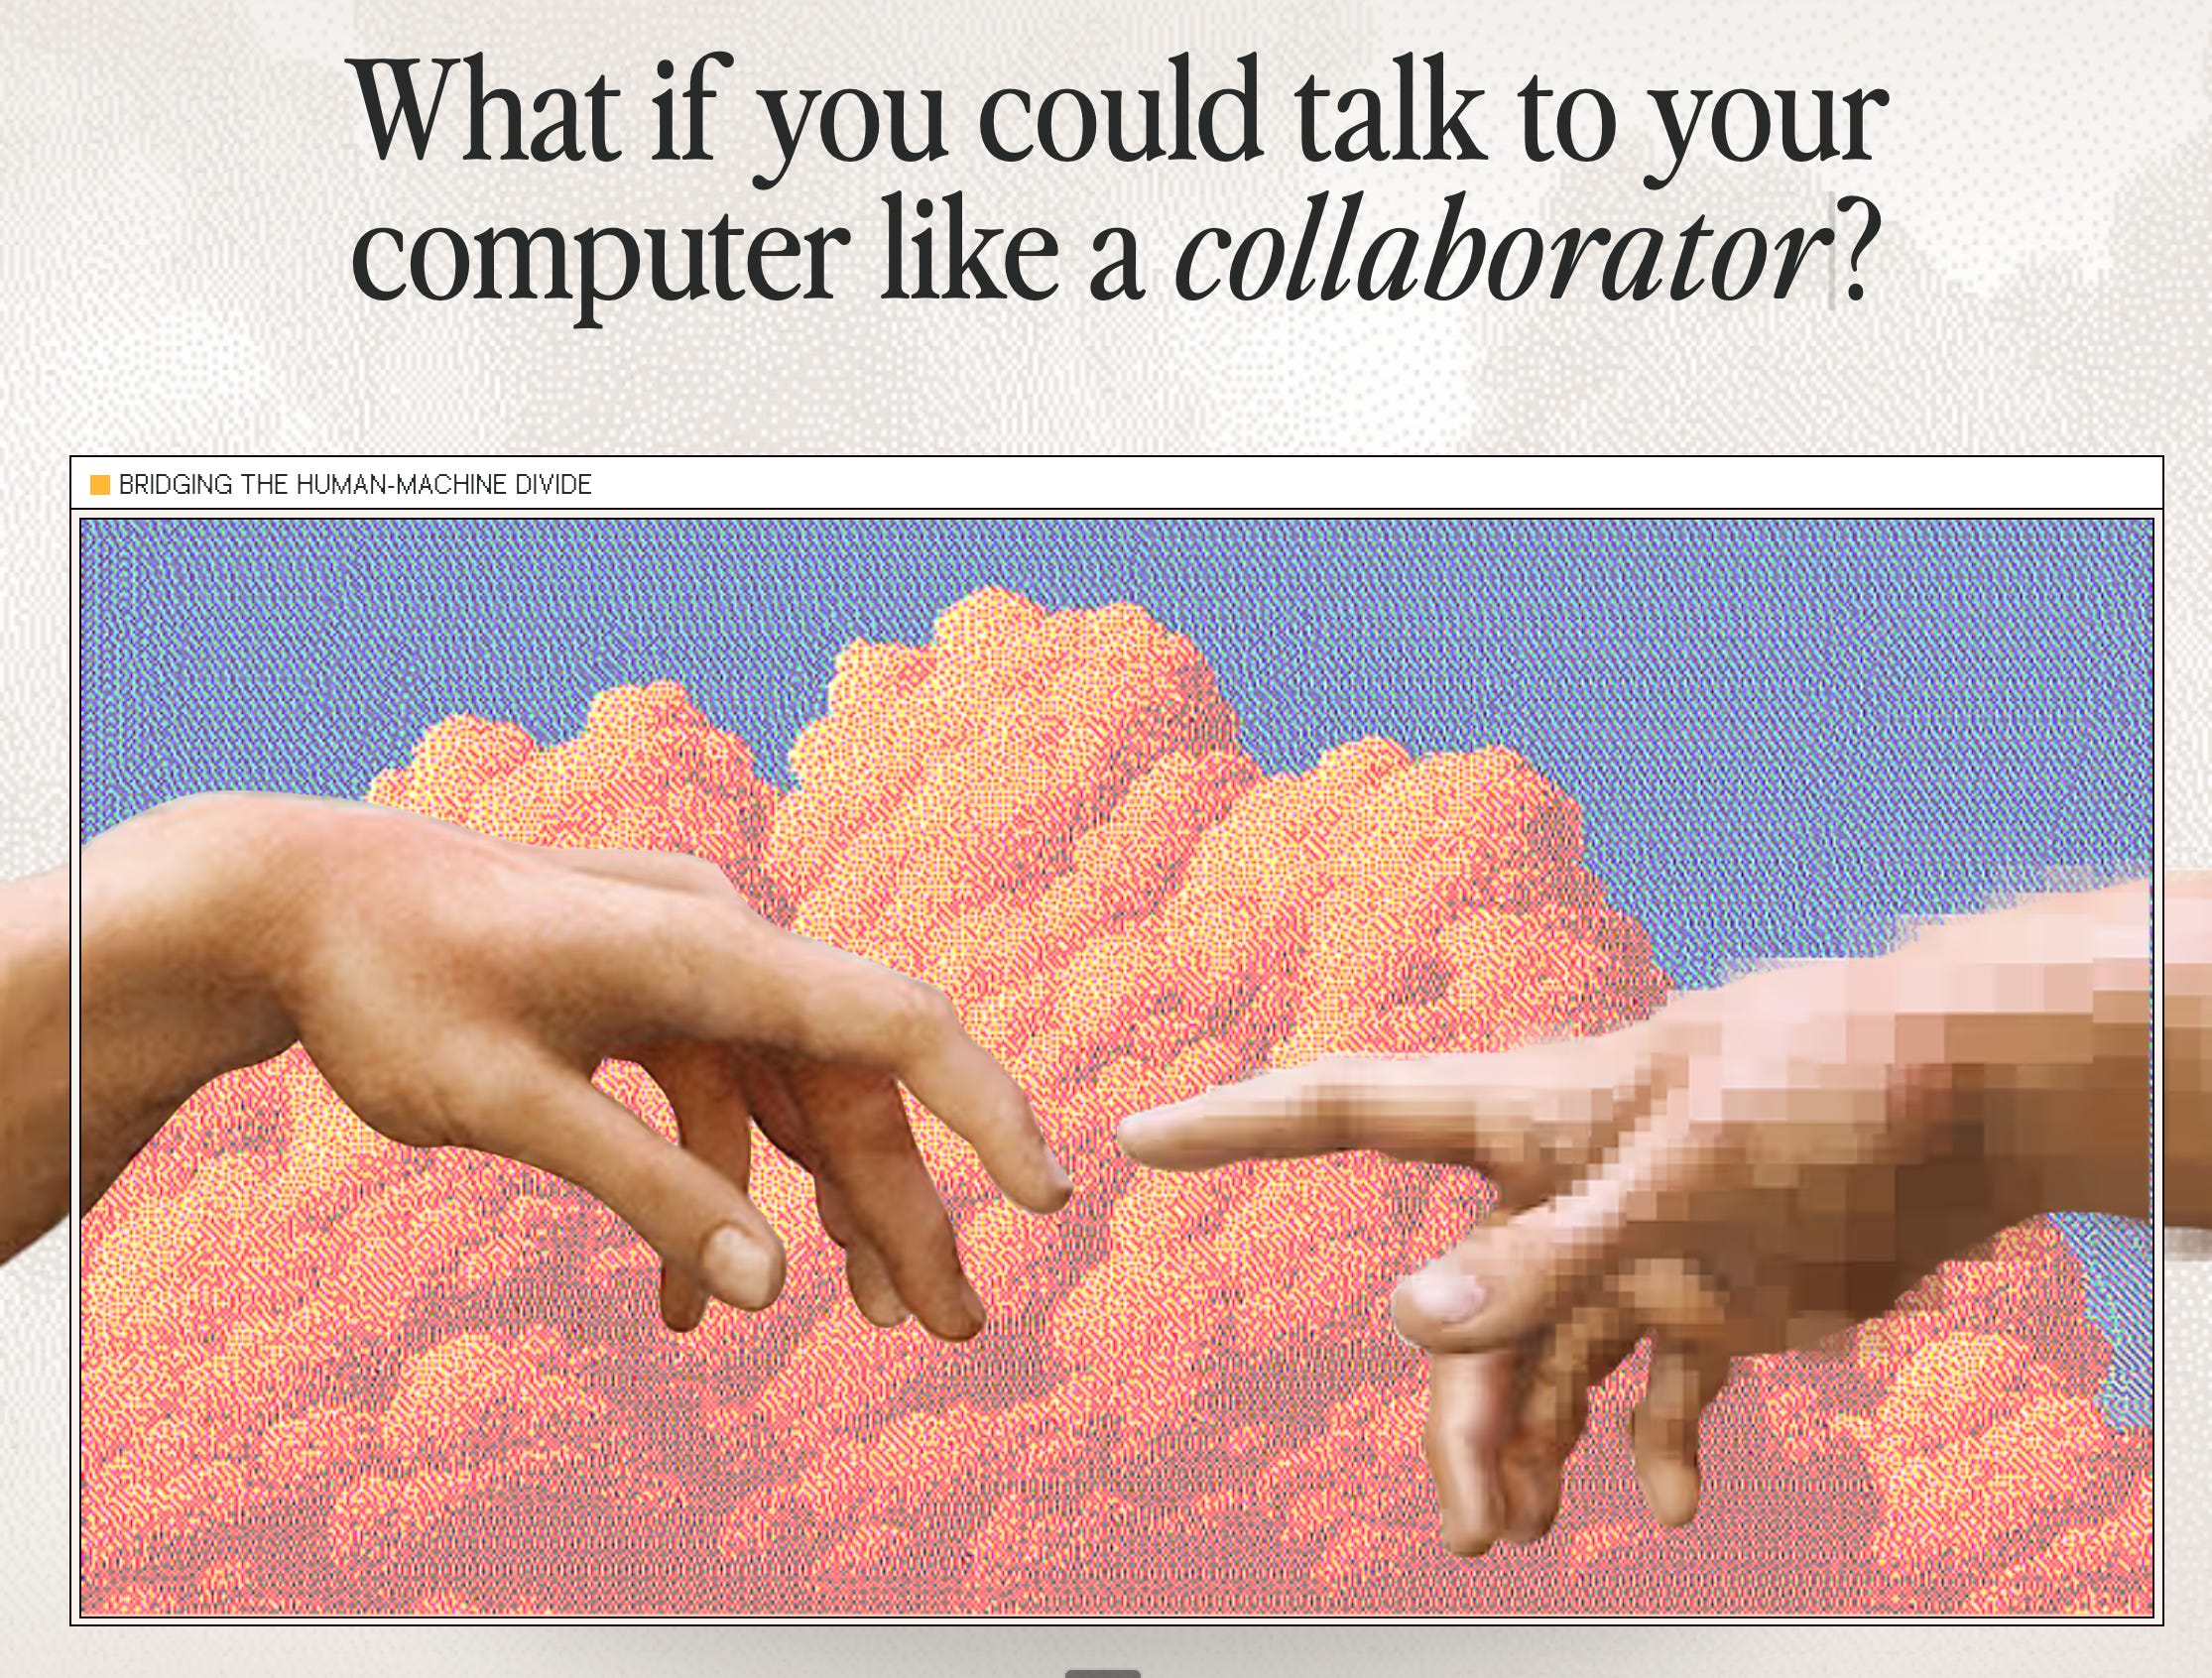
The best developer tools are all using this terminal/ASCII aesthetic with dithering and film grain. skills.sh, Claude Code, tavus.io. It's relatable to devs who live inside CLIs all day. Your brand reflects your audience's actual environment.
skills.sh does Unicode block text. Claude Code does terminal-style graphics. tavus.io does dithered halftone with retro window frames.
Part 1: the image generator
What I actually built
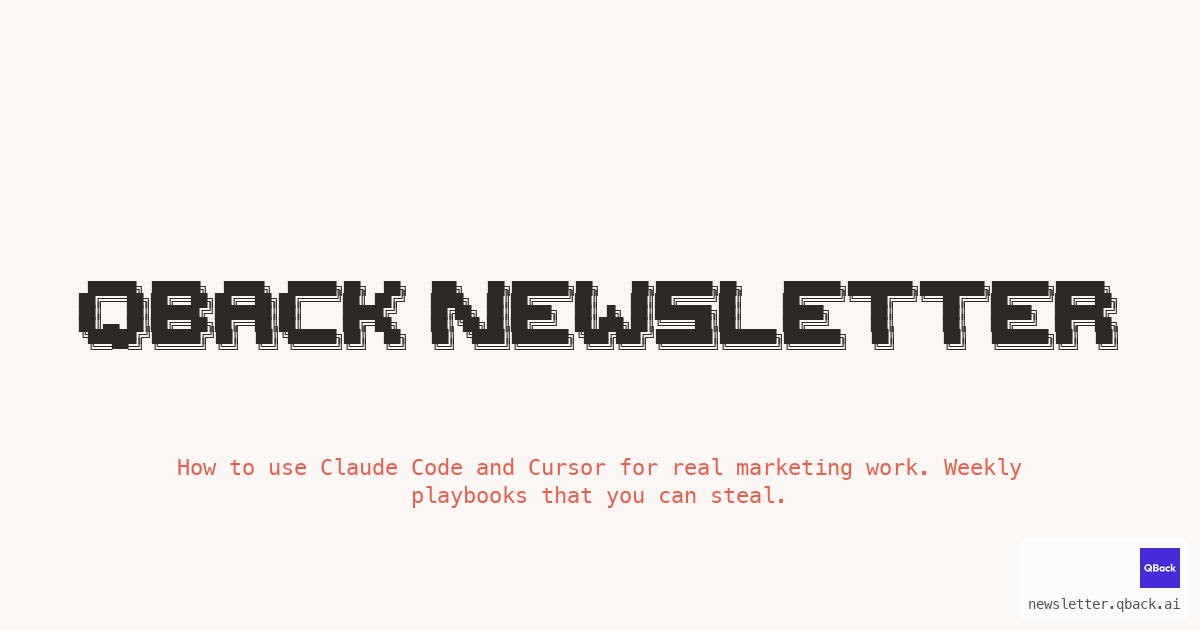
The setup is super simple. I say “create a newsletter header for ABM WEEKLY with that retro dithered look” in Cursor. Python script generates Unicode block text, applies dithering, scanlines, grain, adds branding, outputs a 1200x630 PNG. No Figma, no Canva, no switching apps, I just stay in my editor.
The real numbers
Took about 30-45 minutes to get the whole thing working. Opus 4.5 wrote most of the 1200-line Python script, I added a Cursor skill so I could talk to it in English, and a config file with 13 color schemes. Now it's under 5 seconds per image.
How I actually built this
I didn't write a script. I had a conversation with Opus 4.5 and we built it iteratively.
I started with: “I want the aesthetic to be very similar to skills.sh. Something that Claude Code did, something that Cursor is also doing. It has to be super super cool.” And it built a first version, but it was missing something.
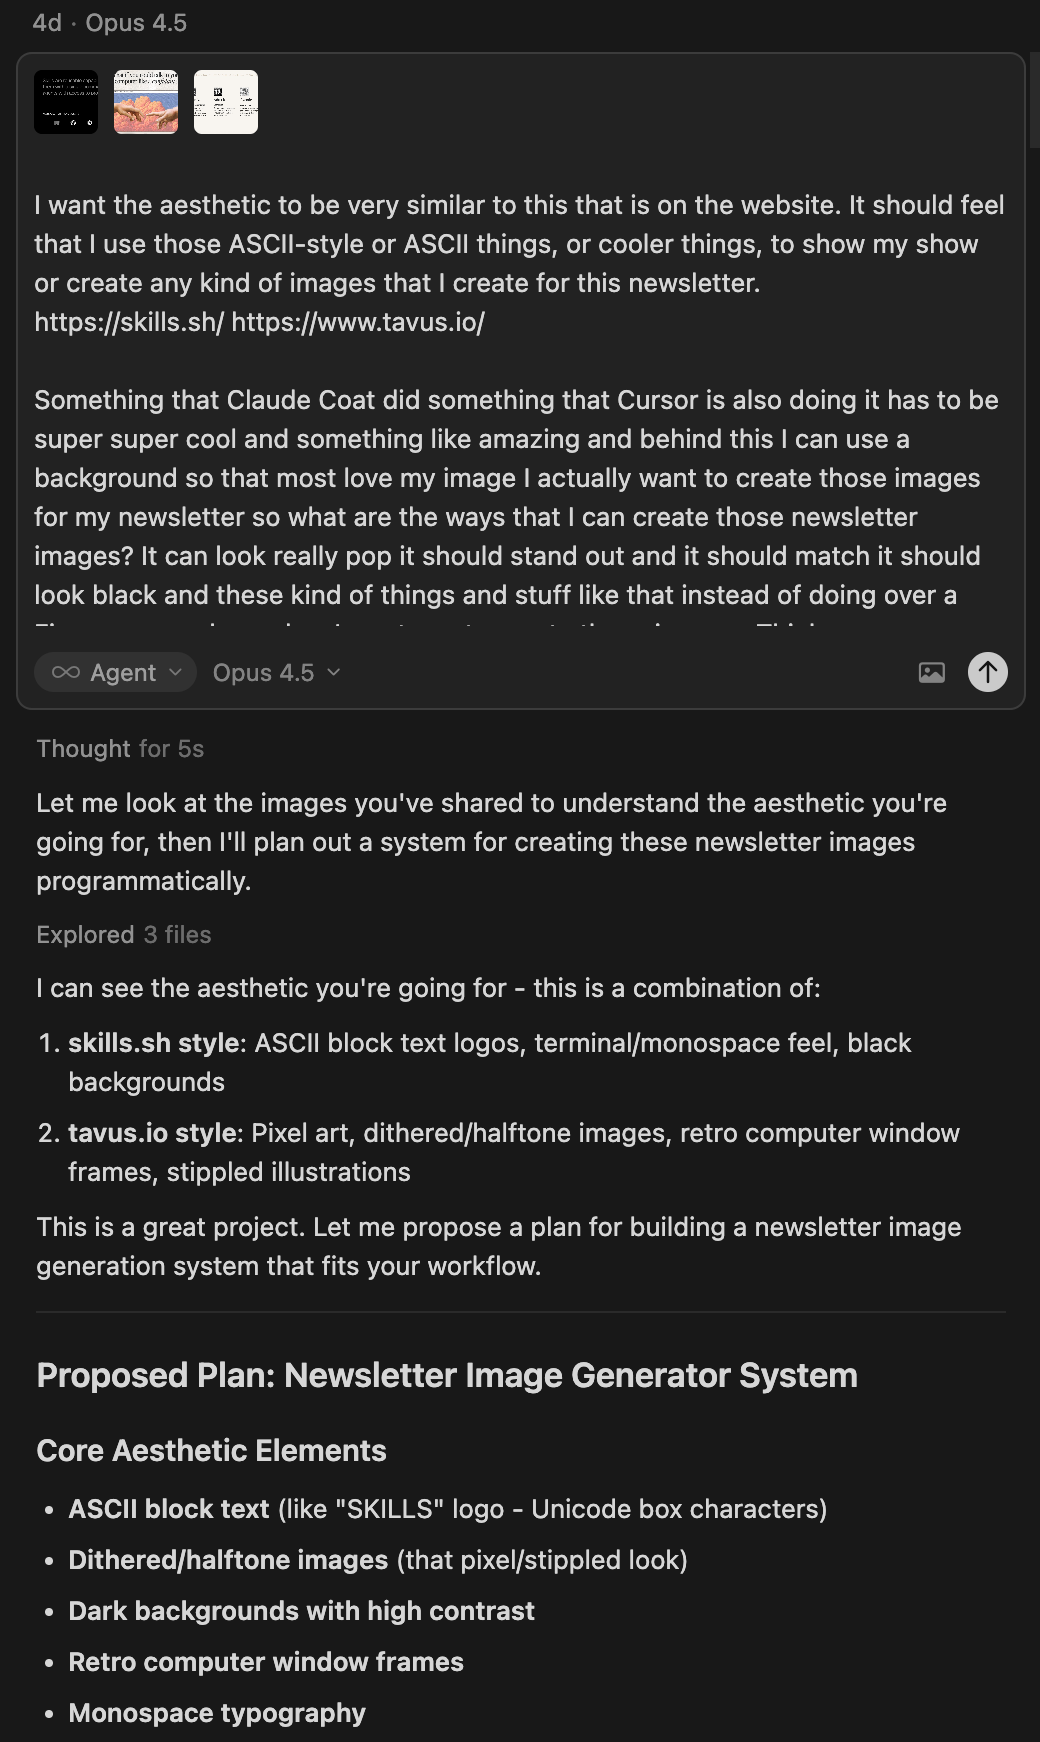
So I said: "You haven't added dithering effects or aesthetic. Like I also want a dithering type of pure aesthetic." And we added noise/grain texture for that film grain look, CRT scanlines for old monitor vibes, vignette for darkened corners and that cinematic feel, and dither textures like dots, ordered patterns, crosshatch.

And since I don't understand colors that well, I asked: "What is the hex code of that matrix green? Any more hex codes of colors that we might be using?" And we ended up building 13 different color schemes, from classic terminal to premium amber/gold to that warm tavus.io cream.
How it actually works
The Python script
I built newsletter_image_generator.py that handles everything. It does ASCII text rendering with Unicode block characters that look like the classic terminal art:
 █████╗ ██████╗ ███╗   ███╗
██╔══██╗██╔══██╗████╗ ████║
███████║██████╔╝██╔████╔██║
██╔══██║██╔══██╗██║╚██╔╝██║
██║  ██║██████╔╝██║ ╚═╝ ██║
╚═╝  ╚═╝╚═════╝ ╚═╝     ╚═╝
I went a bit overboard with 13 color schemes and dithering effects but whatever. And it automatically adds QBack logo and newsletter.qback.ai URL to every image so branding is handled.
So something like this.
The Cursor/Claude Code skill
I created a skill file so instead of CLI flags I just say "Create a newsletter header for AI OPS" or "Make it retro with that grainy film look." Skill figures out what flags to use.
The skill file (it looked like this)
Save this as .cursor/skills/newsletter-images/SKILL.md in your project. You’ll need the Python script and pip install Pillow pyfiglet first.
---
name: newsletter-images
description: Generate ASCII/terminal-style newsletter images with dithering effects. Use when user asks to create images, headers, graphics, or visuals for newsletters, LinkedIn, Twitter, or other social media. Also use when user mentions retro, dithered, grainy, vintage, scanlines, or CRT aesthetic.
---

# Newsletter image generator skill

When the user asks you to create, generate, or make images for newsletters or social media, use this skill.

## Color selection workflow

The user is not a designer. Ask about the vibe first:

> "What vibe are you going for?
> - classic hacker/builder (black background, white/green text)
> - matrix/AI energy (black with neon green)
> - warm & human (cream background with coral accent)
> - premium/luxury (black with amber/gold text)
>
> Want me to generate quick samples?"

## Quick reference

| User says | Use this |
|---|---|
| "hacker", "builder", "classic" | `--style dark_terminal` |
| "matrix", "AI", "green" | `--style dark_matrix` |
| "warm", "human", "friendly" | `--style tavus_warm` |
| "premium", "luxury", "gold" | `--style amber_noir` |
| "retro", "vintage" | `--retro` |
| "grainy", "film grain" | `--noise` |
| "scanlines", "CRT" | `--scanlines` |

## Basic command

```bash
python newsletter_image_generator.py --title "TITLE" --ascii-font unicode_block [options]
```

## Examples

```bash
# Newsletter header
python newsletter_image_generator.py --title "ABM WEEKLY" --ascii-font unicode_block --style dark_terminal

# Full retro
python newsletter_image_generator.py --title "AI OPS" --ascii-font unicode_block --retro

# Matrix + retro + dots
python newsletter_image_generator.py --title "DITHER" --ascii-font unicode_block --style dark_matrix --retro --texture dots
```
PART 2: Video Generation
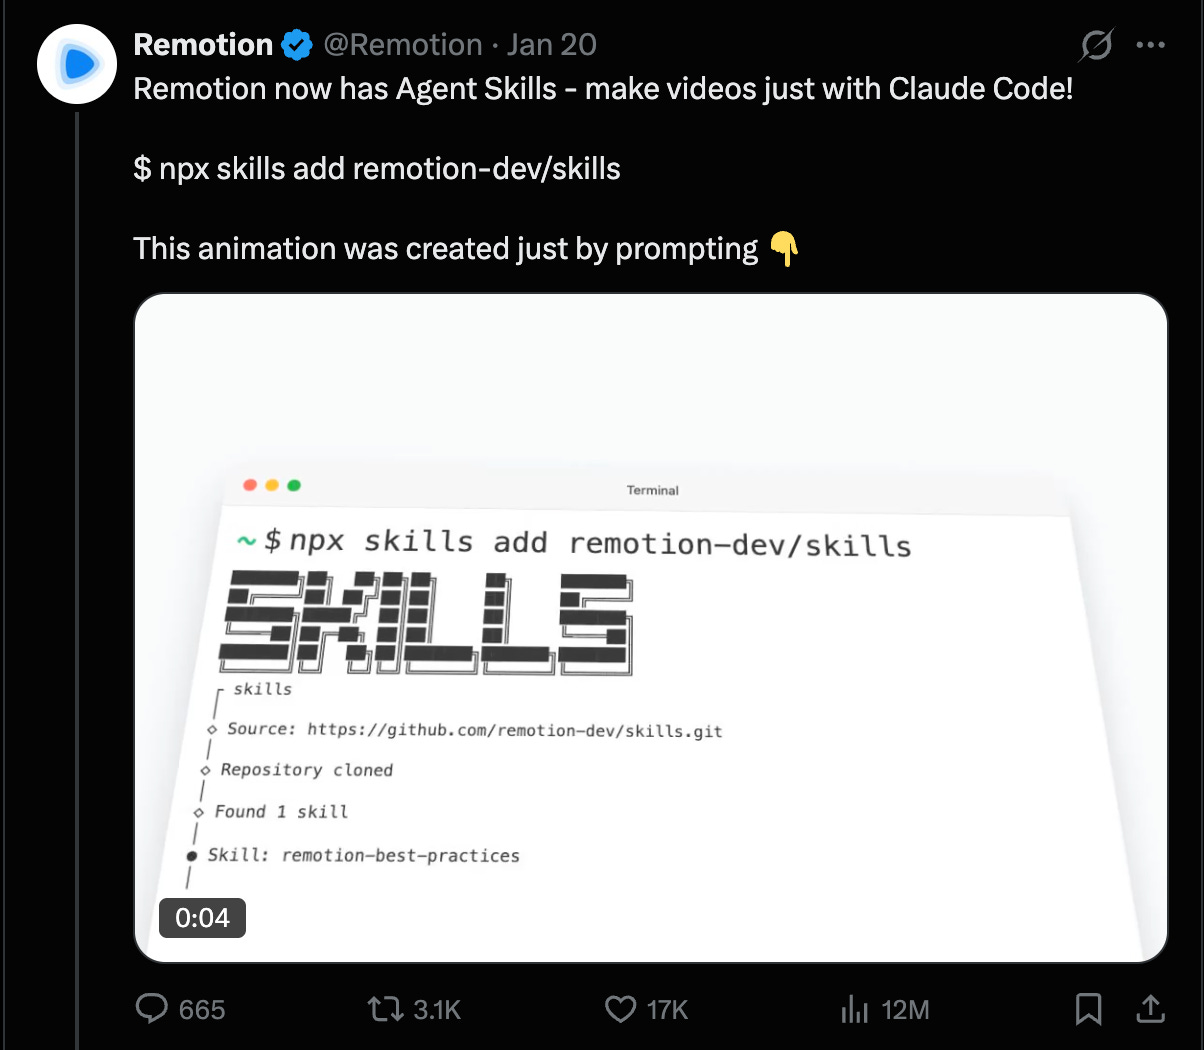
You might've seen the Remotion Skills video that went viral on X. I built a video generator inside Cursor using the same approach.
The prompts I used with Opus 4.5 (thinking)
The initial prompt was: “Create a Remotion animation for a newsletter announcement. Frame the entire content inside a stylized email client mockup (Gmail-style). Show an email from ‘QBack Newsletter’ with subject line, then animate screenshots inside the email body area.”
Here is the GitHub gist to see the entire prompts + setup and my chat messages with Opus 4.5.
For the color scheme I specified: Background #FBF7F4 (Warm Cream), Text #2D2A26 (Charcoal), Accent #E85D4C (Coral Red), Frame/Border #E8E0D8 (Warm Gray).
For the animation style I said: “Make it scroll-stopping with a notification badge that bounces, a like counter that increments, progress dots for slides, cards that slide up from below with slight rotation, exit by sliding up and fading out, and a subtle breathing animation on the window.”
(Opus suggested this, I just said yes)
Video Setup
1. Create Remotion project
npx create-video@latest
cd your-project
2. Add your assets
Place in /public folder: newsletter-header.png for your newsletter header image, then screenshot-1.png, screenshot-2.png, and screenshot-3.png for your content screenshots.
3. The core components
The video is built with animated React components.
GrainOverlay handles the film grain texture using an SVG filter for fractal noise that changes every few frames.
NotificationBadge creates that bouncing notification on the sender avatar using spring animations.
LikeCounter is an animated heart that fills and increments as likes go up. ProgressDots shows TikTok-style slide indicators where the active dot expands. And EmailClientFrame is the Gmail-style wrapper with traffic lights, sidebar, and everything.
const GrainOverlay: React.FC<{ frame: number; intensity?: number }> = ({ frame, intensity = 0.05 }) => {
  const seed = Math.floor(frame / 3);
  // SVG filter for fractal noise that changes every few frames
};

const NotificationBadge: React.FC<{ frame: number; fps: number }> = ({ frame, fps }) => {
  const badgeIn = spring({ frame: Math.max(0, frame - 5), fps, config: { damping: 10, stiffness: 200 } });
  const bounce = Math.sin(frame * 0.15) * 2;
  // Returns a bouncing "1" badge
};

const LikeCounter: React.FC<{ frame: number; fps: number; startFrame: number }> = ({ frame, fps, startFrame }) => {
  const count = Math.min(Math.floor(progress / 3), 7);
  // Heart changes from 🤍 to ❤️ as likes increase
};
4. Register and Render
// Root.tsx
export const RemotionRoot: React.FC = () => {
  return (
    <Composition
      id="NewsletterAnnouncement"
      component={QBackNewsletterAnnouncement}
      durationInFrames={360}
      fps={30}
      width={1280}
      height={720}
    />
  );
};
npx remotion render NewsletterAnnouncement out/newsletter.mp4What this CAN’T do
Let me be real about the limitations because there are definitely things this setup can’t handle.
You can’t do 3D rendering. You can’t create images like Clicker’s 3D renders because that would need actual 3D software or an image LLM where you keep prompting until you get what you want, which is a different workflow entirely.
You also can’t do complex photo manipulation since this is ASCII/terminal aesthetic only. Photorealistic stuff is Midjourney or DALL-E territory.
It’s also simple compositions only, meaning one title, optional subtitle, optional window frame, not a full design tool. And videos need assets so you still need to create the screenshots that go inside the frames.
But for newsletter headers, social media images, and announcement videos in the developer/builder aesthetic, it’s exactly what you need.
The stack
For images you need Python 3.x, Pillow for image manipulation (pip install Pillow), and pyfiglet for ASCII art generation (pip install pyfiglet). For videos you need Node.js, Remotion which is a React-based video framework (npx create-video@latest), and React which comes with Remotion.
That’s it. No API keys, no subscriptions, no cloud services.
Who should use this?
Dev tools companies probably already doing something similar (for images). Newsletter writers who want consistent headers without design skills. Anyone tired of Canva. Anyone who wants the same colors and format every time. Or wants to create instant product videos.
Happy building, signing off your quarterback! 🏈